
Nothing beats the pure, nostalgic taste of homemade Vanilla Ice Cream on a warm summer afternoon. As a mom of three, I believe that the best memories start in the kitchen with simple, wholesome ingredients. This recipe produces a remarkably velvety texture and a rich flavor that puts store-bought tubs to shame.
You will find that making your own treats allows you to control the quality of every single drop. This particular Vanilla Ice Cream is nourishing for the soul and incredibly easy to whip up with your little ones. It serves as the perfect canvas for any topping or stands beautifully all on its own. Your family will definitely ask for second scoops of this creamy delight every time you make it.
Why You’ll Love This Vanilla Ice Cream Recipe
- Pure Ingredients: This recipe uses only real food, ensuring your family avoids the artificial stabilizers and gums found in commercial Vanilla Ice Cream.
- Effortless Preparation: You do not need to be a professional pastry chef to master this simple whisk-and-churn method.
- Nourishing Quality: By choosing grass-fed dairy and natural sweeteners, you provide a nutrient-dense treat that feels indulgent yet clean.
- Versatile Pairing: Whether you serve it with a warm cobbler or a fresh fruit salad, this Vanilla Ice Cream complements every dessert imaginable.
Ingredients You’ll Need
Quality is everything when you are making Vanilla Ice Cream. Because the ingredient list is so short, each component must shine. I always recommend sourcing the highest quality dairy you can find.
Grass-fed heavy cream and whole milk provide a deeper yellow hue and a much richer profile. Furthermore, using a real vanilla bean or a high-end extract makes a world of difference in the final aroma. When we choose better ingredients, we show our family that we care about their health and their palate.
| Ingredient | Amount | Purpose |
| Heavy Cream | 2 Cups | Provides the essential fat for a creamy, smooth mouthfeel. |
| Whole Milk | 1 Cup | Balances the richness of the cream for a lighter texture. |
| Maple Syrup or Honey | 3/4 Cup | Adds natural sweetness without the refined sugar crash. |
| Vanilla Bean or Extract | 1 Tablespoon | Delivers the signature floral and warm notes of Vanilla Ice Cream. |
| Sea Salt | 1 Pinch | Enhances all the other flavors and balances the sweetness. |
Substitutions & Variations
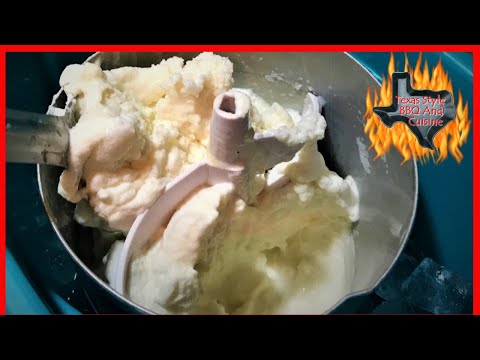
Note: This video is for demonstration purposes and may use a slightly different method.
I know that every family has different dietary needs, and I love finding healthy swaps that keep everyone happy. If you want to make a dairy-free Vanilla Ice Cream, you can easily substitute the heavy cream and milk with full-fat canned coconut milk or cashew cream. These plant-based fats offer a similar decadence while remaining gentle on sensitive tummies.
Additionally, you can swap the maple syrup for a bit of monk fruit sweetener if you are watching your sugar intake. For those who want more texture, feel free to fold in raw cacao nibs or crushed walnuts after the churning process.
Another wonderful variation involves infusing the milk. You might try steeping some lavender buds or a cinnamon stick in the milk before you mix it with the cream. This adds a sophisticated layer of flavor to your Vanilla Ice Cream without requiring extra effort.
Always remember that the goal is to keep the recipe simple and nourishing. Avoid using imitation vanilla flavor, as it often contains synthetic chemicals that mask the true beauty of the beans. Stick to what nature provides, and you will never go wrong.
If you’re looking for a delightful way to enjoy your dairy-free Vanilla Ice Cream with a twist, consider trying a refreshing Vanilla Iced Coffee. This delicious drink not only complements the creaminess but adds a perfect caffeine kick, making your dessert experience even more enjoyable. Check out the recipe for Vanilla Iced Coffee.
Step-by-Step Instructions
- Prepare the Base: In a large mixing bowl, whisk together the heavy cream, whole milk, and your choice of natural sweetener. Ensure the sweetener dissolves completely into the dairy.
- Add the Flavor: Slice the vanilla bean lengthwise and scrape the seeds into the mixture. If you use extract, stir it in along with a tiny pinch of sea salt. The salt acts as a flavor catalyst for the Vanilla Ice Cream.
- Chill the Mixture: Cover the bowl and place it in the refrigerator for at least two hours. Chilling the base ensures that the Vanilla Ice Cream freezes quickly, which results in smaller ice crystals and a smoother finish.
- Churn the Cream: Pour the chilled mixture into your ice cream maker. Follow the manufacturer’s instructions and churn until the mixture reaches the consistency of soft-serve. This usually takes about 20 to 25 minutes.
- The Final Freeze: Transfer the churned Vanilla Ice Cream into a freezer-safe container. Smooth the top with a spatula and cover it tightly. Freeze for an additional 4 hours or until firm.
- Serve and Enjoy: Take the container out of the freezer about five minutes before serving. This allows the Vanilla Ice Cream to soften slightly, making it much easier to scoop for your eager family.
Pro Tips for Success
To achieve the best results with your Vanilla Ice Cream, you must pay attention to the temperature. Always freeze your ice cream maker’s bowl for at least 24 hours before you begin. A bowl that is not cold enough will fail to freeze the mixture properly, leaving you with a liquid mess.
Furthermore, avoid over-churning the base. If you let the machine run too long, the fat in the heavy cream may turn into tiny bits of butter, which creates an unappealing grainy texture. You want to stop the machine the moment the Vanilla Ice Cream looks thick and holds its shape.
Another secret to professional-grade Vanilla Ice Cream is the use of a little bit of vegetable glycerin or a splash of vodka. These ingredients lower the freezing point of the mixture, which prevents the ice cream from becoming rock-hard in the freezer. Just one teaspoon is enough to keep your dessert scoopable and soft.
Finally, always use a dedicated airtight container. Vanilla Ice Cream absorbs odors from the freezer very easily, so a tight seal is your best defense against “freezer taste.”
To ensure that your homemade Vanilla Ice Cream has the perfect texture, consider the importance of chilling. To further enhance your baking skills, you might want to explore the delectable recipe for Vanilla Pudding Pumpkin Bread, which also highlights essential temperature control techniques. Learn more about it with this link to Vanilla Pudding Pumpkin Bread.
Storage & Reheating Tips
Proper storage is the key to maintaining the integrity of your Vanilla Ice Cream. I recommend using a shallow, insulated container designed specifically for frozen treats. If you do not have one, a glass loaf pan covered tightly with parchment paper and plastic wrap works beautifully.
Always press the parchment paper directly onto the surface of the Vanilla Ice Cream. This simple trick prevents air from touching the cream, which stops ice crystals from forming on top. You should keep the container in the coldest part of your freezer, usually the back, rather than the door.
While we do not “reheat” ice cream in the traditional sense, you might find your Vanilla Ice Cream too hard to scoop after a few days. Simply move the container to the refrigerator for about 10 to 15 minutes before you plan to serve it. This gentle tempering process softens the Vanilla Ice Cream evenly from the outside in.
Never melt it completely and try to refreeze it, as this destroys the airy texture and results in a solid block of ice. Treat your homemade creation with care, and it will stay fresh for up to two weeks.
What to Serve With This Recipe

While Vanilla Ice Cream is a hero on its own, I love pairing it with nourishing sides that balance the sweetness. For a refreshing summer treat, serve a scoop alongside a large bowl of grilled peaches or a vibrant berry salad. The warmth of grilled fruit creates a beautiful contrast with the cold cream.
If you are looking for something more substantial, place a dollop of Vanilla Ice Cream on top of a warm slice of homemade sourdough apple cake. The tang of the sourdough works perfectly with the sweet vanilla notes.
You can also create a healthy “sundae” bar for your kids. I set out small bowls of raw sliced almonds, fresh raspberries, and a drizzle of almond butter. This encourages the children to add healthy fats and antioxidants to their Vanilla Ice Cream experience.
For a savory-sweet twist, try serving a small scoop alongside roasted balsamic strawberries. The acidity of the vinegar cuts through the richness of the dairy beautifully. No matter how you serve it, this Vanilla Ice Cream brings a sense of joy and connection to the table.
While it’s delightful to enjoy Vanilla Ice Cream on its own, pairing it with balanced options can elevate your dessert experience. For instance, a scoop on a warm slice of homemade sourdough or alongside Classic Iced Coffee can provide a refreshing contrast that you won’t want to miss. Try out this delicious combination found in our recipe for Classic Iced Coffee.
FAQs
Can I make this Vanilla Ice Cream without an ice cream machine?
Yes, you certainly can. To make Vanilla Ice Cream without a machine, pour the mixture into a shallow pan and place it in the freezer. Every 30 minutes, take it out and whisk it vigorously to break up ice crystals.
Repeat this process for about 3 hours until the mixture is thick and creamy. While it requires more effort, the result is still delicious and family-approved.
Why does my homemade Vanilla Ice Cream have ice crystals?
Ice crystals usually form when the mixture freezes too slowly or if air gets into the container during storage. To prevent this, ensure your base is very cold before churning and use a high-fat cream. The fat coats the water molecules and prevents them from joining together into large crystals. Additionally, always cover the surface of your Vanilla Ice Cream with parchment paper before sealing the lid.
Is this Vanilla Ice Cream recipe safe for toddlers?
This recipe is wonderful for toddlers because it contains simple, recognizable ingredients. However, if you use honey as a sweetener, ensure your child is over one year old. For younger children, maple syrup is a safer natural alternative. This Vanilla Ice Cream provides healthy fats that are essential for brain development, making it a much better choice than processed snacks.
Vanilla Ice Cream is a beloved dessert known for its creamy texture and rich flavor, often made with real vanilla and wholesome ingredients. This delightful treat can be enjoyed on its own or paired with various desserts, showcasing its versatility as a summer favorite, similar to what you might find in an article about ice cream.
Nutrition Information (per serving)
This Vanilla Ice Cream is a calorie-dense treat, so a small serving goes a long way. Because we use real heavy cream and whole milk, it provides a good source of fat-soluble vitamins like Vitamin A and D. Below is a simple breakdown of the nutritional content for one standard scoop.
| Macro | Amount |
| Calories | 210 kcal |
| Total Fat | 14g |
| Saturated Fat | 9g |
| Carbohydrates | 18g |
| Sugar | 15g |
| Protein | 3g |

Vanilla Ice Cream
- Total Time: 30 mins
- Yield: 4 servings 1x
- Diet: Gluten Free
Description
This homemade Vanilla Ice Cream is made with simple, wholesome ingredients, resulting in a creamy and rich treat that is perfect for summer days.
Ingredients
2 cups Heavy Cream
1 cup Whole Milk
3/4 cup Maple Syrup or Honey
1 tablespoon Vanilla Bean or Extract
1 pinch Sea Salt
Instructions
- In a large mixing bowl, whisk together the heavy cream, whole milk, and your choice of natural sweetener until completely dissolved
- Slice the vanilla bean lengthwise and scrape the seeds into the mixture, adding the extract and sea salt
- Cover the bowl and refrigerate for at least two hours
- Pour the chilled mixture into your ice cream maker and churn according to manufacturer instructions until it reaches a soft-serve consistency
- Transfer the churned ice cream into a freezer-safe container, smooth the top, and freeze for an additional 4 hours to firm up
- Before serving, let the container sit out for about 5 minutes to soften slightly for easier scooping
Notes
Ensure your ice cream maker's bowl is frozen for at least 24 hours before use.
Avoid over-churning to prevent the mixture from becoming grainy.
- Prep Time: 20 mins
- Cook Time: 10 mins
- Category: Dessert
- Method: Churning
- Cuisine: American
Nutrition
- Serving Size: 1 scoop
- Calories: 210 kcal
- Sugar: 15g
- Sodium: 5mg
- Fat: 14g
- Saturated Fat: 9g
- Unsaturated Fat: 0g
- Trans Fat: 0g
- Carbohydrates: 18g
- Fiber: 0g
- Protein: 3g
- Cholesterol: 60mg