
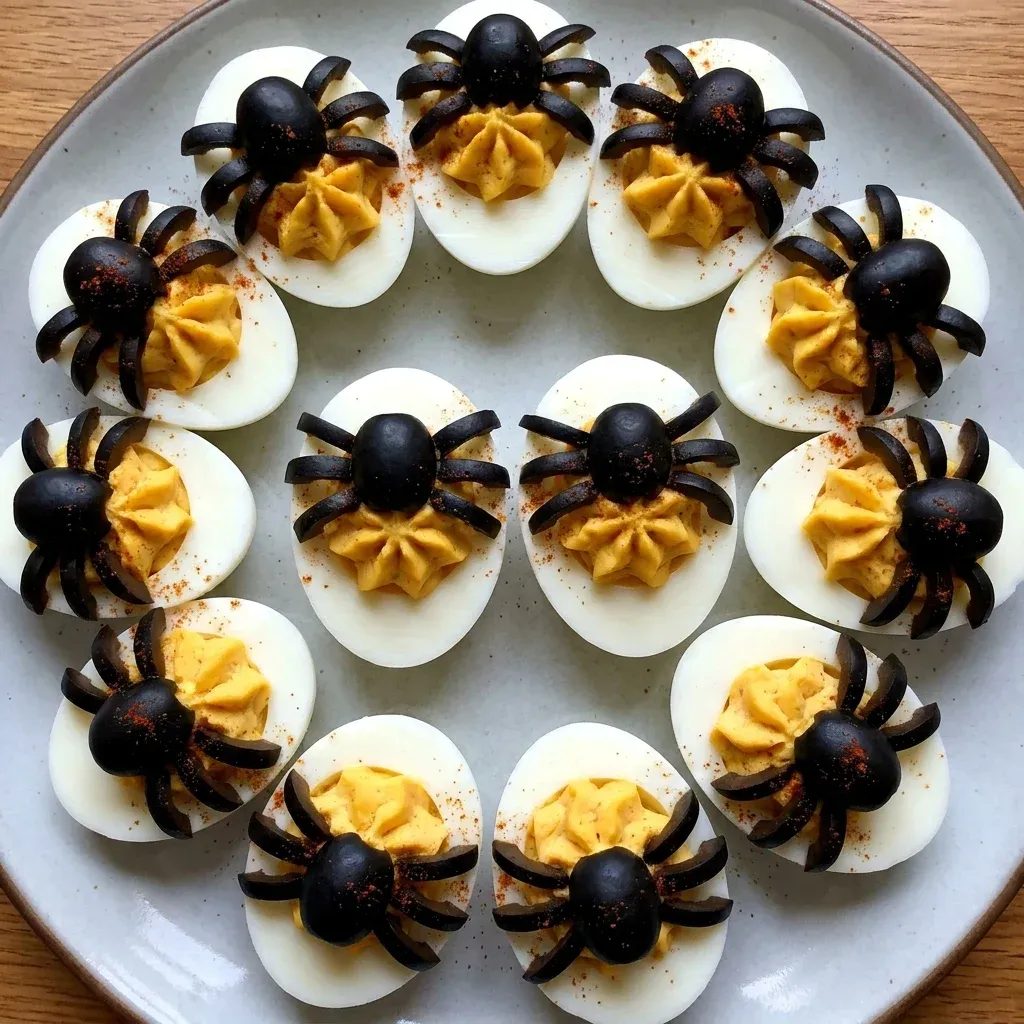
Halloween Deviled Eggs represent more than just a spooky centerpiece; they are a masterclass in protein denaturation and emulsion stability. When you bite into one, you should experience a silky, velvety yolk mixture contrasted by a perfectly firm, bouncy egg white. Achieving this balance requires a deep understanding of how heat affects the structural integrity of the egg.
Many home cooks struggle with rubbery whites or chalky yolks, but I am here to guide you through the molecular transitions that make this appetizer a success. By mastering a few simple techniques, your Halloween Deviled Eggs will offer a sophisticated flavor profile that satisfies the palate while entertaining the eyes.
These treats provide a high-protein, low-carb option that fits perfectly into any festive spread. Let’s dive into the science of the perfect boil and the art of the savory filling.
Why You’ll Love This Halloween Deviled Eggs Recipe
- High Nutrient Density: These Halloween Deviled Eggs provide high-quality leucine and choline, making them a brain-boosting snack for guests of all ages.
- Perfect Emulsion: Using my test kitchen method, you will achieve a filling that is exceptionally smooth and stable, resisting the weeping or separation common in lesser recipes.
- Visual Versatility: The Halloween Deviled Eggs serve as a blank canvas for spooky decorations, allowing you to create edible “spiders” or “eyeballs” without artificial dyes.
Ingredients You’ll Need
Quality ingredients dictate the final texture of your Halloween Deviled Eggs. I always recommend using eggs that are about a week old, as the slightly higher pH levels make the shells easier to remove. For the fat component, high-quality mayonnaise provides the necessary lecithin to bind the yolks into a creamy suspension.
| Ingredient | Quantity | Chef’s Note |
|---|---|---|
| Large Eggs | 12 count | Cold from the fridge to control the cook time precisely. |
| Real Mayonnaise | 1/2 Cup | Acts as the primary emulsifier for the yolk mixture. | 2 Teaspoons | Provides acidity to cut through the richness of the fat. |
| Apple Cider Vinegar | 1 Teaspoon | Brightens the flavor and stabilizes the protein structure. |
| Smoked Paprika | 1/2 Teaspoon | Adds a depth of flavor and a “rusty” autumnal color. |
| Black Olives | 1 Can (Pitted) | Essential for creating the “spider” decorations on your Halloween Deviled Eggs. |
| Sea Salt & Black Pepper | To taste | Always season at the end to ensure the balance is perfect. |
Substitutions & Variations
If you are looking to lighten up your Halloween Deviled Eggs, you can swap the mayonnaise for plain Greek yogurt. This substitution increases the protein content and adds a pleasant tang, though you may need a touch more salt to compensate for the lost richness. For a dairy-free option, mashed avocado works beautifully as a fat substitute; it also naturally dyes the filling a “monstrous” green color, which is perfect for the theme.
To create a “bloody” effect without synthetic dyes, try adding a drop of beet juice to the filling or dusting the finished Halloween Deviled Eggs with a heavy hand of cayenne pepper. For those who enjoy heat, finely minced pickled jalapeños can provide a spicy “kick” that balances the creamy yolks. Always remember that any substitution will alter the moisture content, so add your wet ingredients gradually to maintain the structural integrity of the filling.
For more inspiration on festive foods, check out our 15 Spooktacular Halloween Food Ideas that will elevate your Halloween gathering.
Step-by-Step Instructions
- The Precise Boil: Place your eggs in a single layer in a large saucepan. Cover them with cold water by at least an inch. Bring the water to a rolling boil over high heat. As soon as the water reaches its peak temperature, remove the pan from the heat and cover it with a tight-fitting lid. Let the eggs sit for exactly 12 minutes. This “carry-over” cooking method prevents the formation of the unappetizing green ring around the yolk.
- The Thermal Shock: While the eggs cook, prepare an ice bath. Once the 12 minutes are up, immediately transfer the eggs into the ice water. This rapid cooling stops the cooking process instantly and causes the egg membrane to shrink away from the shell, making your Halloween Deviled Eggs much easier to peel.
- The Peeling Phase: Gently crack the shells all over and peel them under cool running water. The water helps lubricate the space between the white and the membrane. Pat the eggs dry with a paper towel.
- Slicing and Extraction: Use a sharp, non-serrated knife to slice each egg in half lengthwise. Wipe the blade between each cut to ensure clean edges. Gently pop the yolks into a medium mixing bowl.
- Creating the Emulsion: Mash the yolks with a fork until they resemble fine sand. Add the mayonnaise, Dijon mustard, vinegar, and smoked paprika. Whisk vigorously until the mixture is completely smooth. For the ultimate professional finish on your Halloween Deviled Eggs, pass the yolk mixture through a fine-mesh sieve.
- Piping the Filling: Transfer the yolk mixture to a piping bag fitted with a large round tip. Pipe the filling into the egg white hollows, mounding it slightly above the rim.
- Spooky Decoration: Slice a black olive in half lengthwise. Place one half in the center of the yolk to represent the spider’s body. Slice the other half into thin strips to create eight legs. Arrange the legs around the body to finish your Halloween Deviled Eggs.
Pro Tips for Success
To ensure your Halloween Deviled Eggs look like they came out of a professional test kitchen, pay attention to the pH of your water. Adding a teaspoon of baking soda to the boiling water can raise the pH level of the egg, which helps the albumen release from the shell more easily. Furthermore, always use a piping bag rather than a spoon to fill the whites.
This creates a uniform look and prevents air pockets in the filling. If you find your filling is too stiff, add a teaspoon of olive oil; the extra fat will provide a glossy sheen and a smoother mouthfeel. Finally, never skip the ice bath.
The sulfur in the whites reacts with the iron in the yolks at high temperatures, creating that grey-green discoloration. Rapid cooling is the only way to prevent this chemical reaction in your Halloween Deviled Eggs.
Enhance your Halloween treats by exploring 14 Halloween Cupcakes & Cookies for additional festive recipes to delight your guests.
Storage & Reheating Tips
Storage is critical because the yolks in Halloween Deviled Eggs can easily oxidize and develop a tough “skin” when exposed to air. If you are making these in advance, store the whites and the filling separately. Place the whites in a sealed container with a damp paper towel to keep them hydrated.
Put the yolk filling in a piping bag, squeeze out all the air, and seal the end. When you are ready to serve, simply pipe the fresh filling into the whites. If the Halloween Deviled Eggs are already assembled, cover them tightly with plastic wrap, ensuring the wrap does not touch the filling, and keep them refrigerated.
They are best consumed within 48 hours. Never freeze deviled eggs, as the cellular structure of the egg white will collapse, resulting in a watery, rubbery mess.
What to Serve With This Recipe
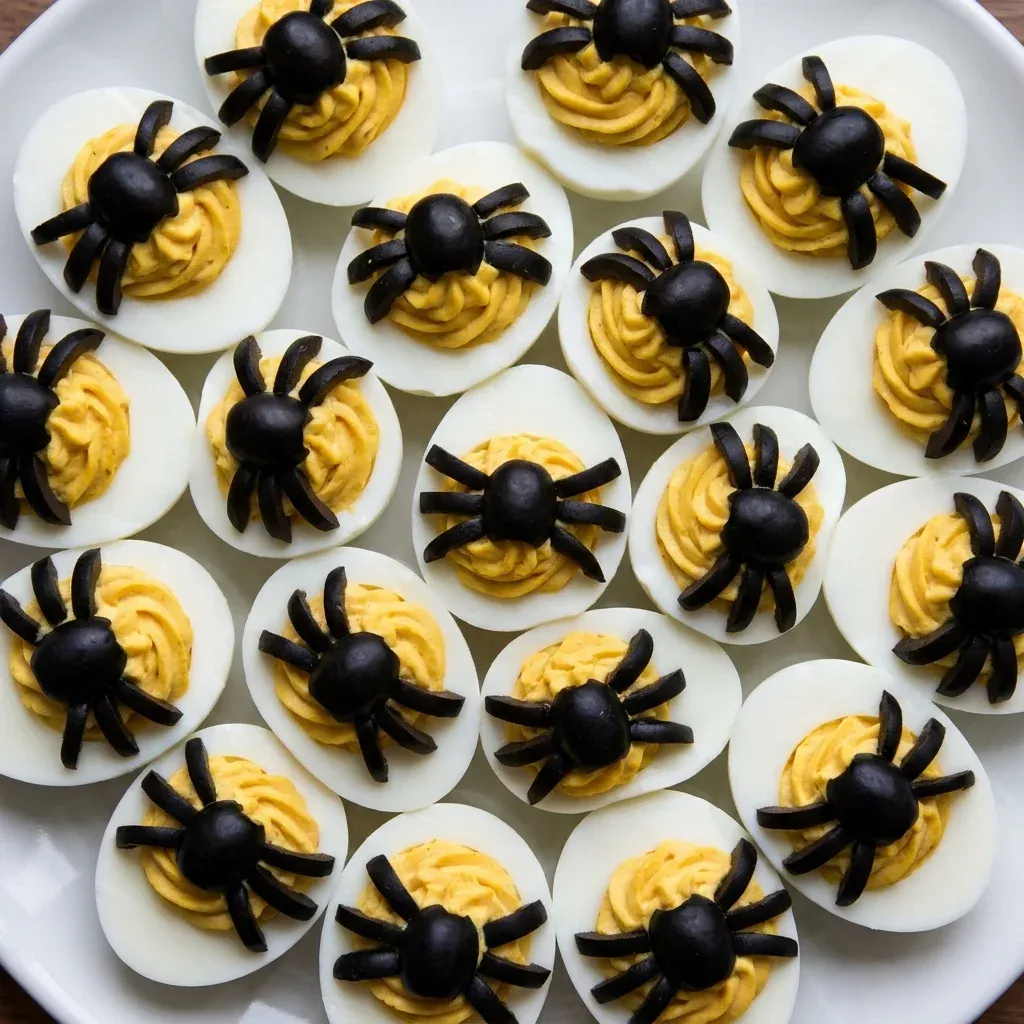
To balance the richness of the Halloween Deviled Eggs, I recommend serving them alongside light, crisp vegetables. A platter of roasted tricolor carrots or a vibrant spinach salad with a lemon vinaigrette provides the necessary acidity to cleanse the palate between bites.
Since these eggs are quite savory, they also pair exceptionally well with a “charcuterie” board featuring lean meats and fermented pickles. If you want to keep the theme going, serve your Halloween Deviled Eggs with “witch’s fingers” made from roasted asparagus spears topped with almond sliver “nails.” These healthy, fiber-rich pairings turn a simple appetizer into a well-rounded snack plate that won’t leave your guests feeling weighed down by heavy fats.
Complete your Halloween spread with 20 Easy No-Bake Halloween Treats that require little effort but deliver on taste and presentation.
FAQs
Why do my Halloween Deviled Eggs have a green ring around the yolk?
The green ring is a result of a chemical reaction between iron in the yolk and sulfur in the white, forming ferrous sulfide. This occurs when eggs are overcooked or cooled too slowly. Following my 12-minute off-heat method and using an immediate ice bath will eliminate this problem entirely.
Can I make Halloween Deviled Eggs ahead of time?
Yes, you can boil and peel the eggs up to two days in advance. However, for the best texture and appearance, I recommend filling and decorating the Halloween Deviled Eggs no more than a few hours before your event to prevent the yolks from drying out or the olives from bleeding color into the filling.
How do I make the filling extra smooth?
The secret is mechanical breakdown. Instead of just using a fork, use a food processor or a balloon whisk to aerate the yolks. If you want a truly five-star texture for your Halloween Deviled Eggs, push the dry yolks through a fine-mesh tamis or sieve before adding any liquid ingredients.
Halloween Deviled Eggs are a fun and creative twist on traditional deviled eggs, often decorated to resemble spooky creatures and themes. These festive snacks can be enhanced by various flavor combinations and garnishes, making them a popular choice for Halloween celebrations; read more about similar themed foods on this Halloween page.
Nutrition Information (per serving)
This table reflects the nutritional profile for two Halloween Deviled Eggs halves, which constitutes one standard serving.
| Metric | Amount |
|---|---|
| Calories | 145 kcal |
| Total Fat | 11g |
| Protein | 6g |
| Carbohydrates | 1g |
| Sodium | 210mg |
By understanding the science of the egg, you have transformed a simple party snack into a culinary achievement. These Halloween Deviled Eggs offer the perfect combination of technical precision and holiday fun. Enjoy the process of creating them, and your guests will certainly notice the difference in quality and flavor.
Print
Halloween Deviled Eggs
- Total Time: 30 mins
- Yield: 4 servings 1x
- Diet: Gluten Free
Description
These Halloween Deviled Eggs offer a high-protein, low-carb option that is both visually appealing and flavorful, enhanced by a sophisticated filling and spooky decorations.
Ingredients
12 Large Eggs
1/2 cup Real Mayonnaise
2 teaspoons Dijon Mustard
1 teaspoon Apple Cider Vinegar
1/2 teaspoon Smoked Paprika
1 can Black Olives (Pitted)
Sea Salt & Black Pepper to taste
Instructions
- Place eggs in a single layer in a large saucepan, cover with cold water, and bring to a rolling boil. Remove from heat and cover for 12 minutes
- Prepare an ice bath while eggs cook. Transfer eggs to the ice bath immediately after time is up to stop cooking
- Gently crack and peel the eggs under cool running water and pat dry
- Slice each egg in half lengthwise and pop yolks into a mixing bowl
- Mash yolks, then mix in mayonnaise, mustard, vinegar, and paprika. Whisk until smooth
- Transfer yolk mixture to a piping bag and fill egg whites
- Decorate with sliced black olives to create 'spiders'
Notes
Use a piping bag for even filling without air pockets.
Store yolks and whites separately if preparing in advance to maintain texture.
- Prep Time: 20 mins
- Cook Time: 10 mins
- Category: Appetizer
- Method: Boiling and Filling
- Cuisine: American
Nutrition
- Serving Size: 2 halves
- Calories: 145 kcal
- Sugar: 0 g
- Sodium: 210 mg
- Fat: 11 g
- Saturated Fat: 1.5 g
- Unsaturated Fat: 9 g
- Trans Fat: 0 g
- Carbohydrates: 1 g
- Fiber: 0 g
- Protein: 6 g
- Cholesterol: 186 mg